Before We Get Started
AdMob is an advertisement platform made by Google as an extension of AdSense to allow app developers to make earnings with easy to implement in-app ads.
In this post, I will go over how to add ads to your iOS app, type of ads you can implement, and some best practices that I’ve came across while adding ads to my apps.
But before we get started into the technicals, let’s tackle the elephant in the room. No one likes ads. Even developers don’t like to add ads in their apps like everyone else, and we would rather have free apps with no ads. But us developer have to make money for the hard work we put in to make those amazing apps we give to others for free. Each app cost something, whether that was the membership fees you pay for Apple yearly, or the cost of your website hosting. There are some ways where you can still serve ads, but your app will still look elegant and clean without having to make huge sacrifices.
Signing Up
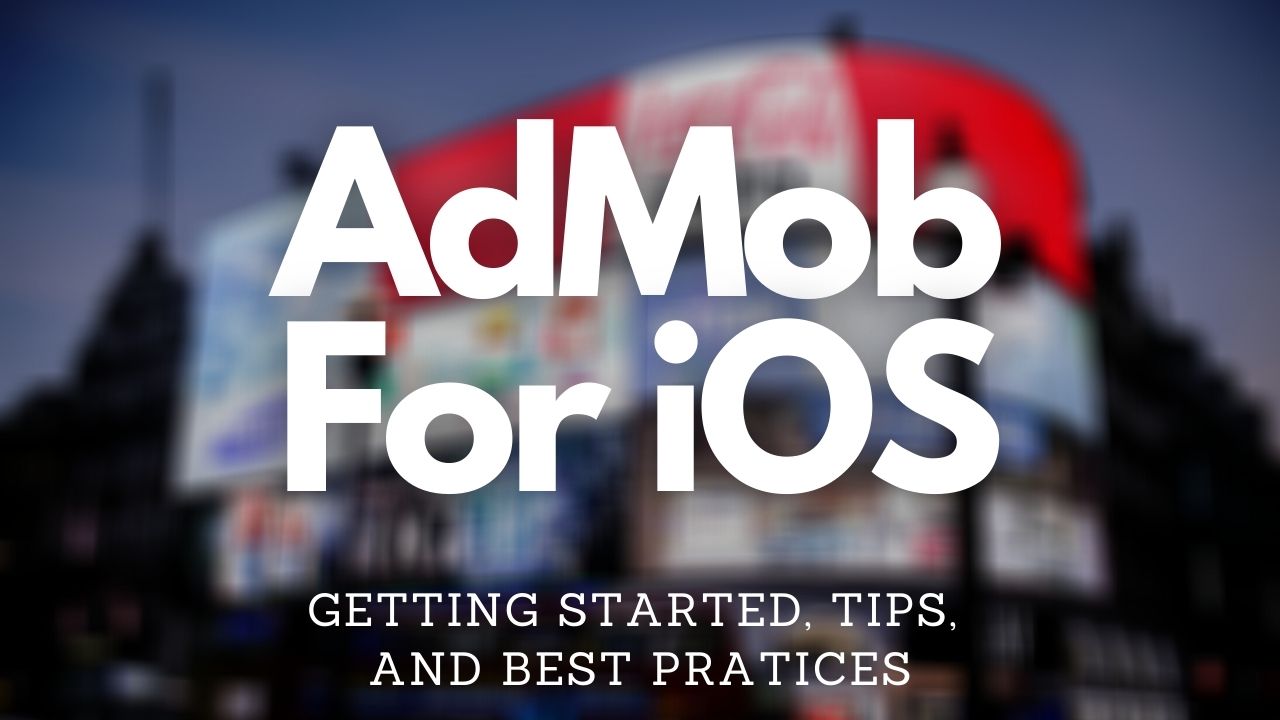
Now, let’s get started by first setting up your AdMob account. Head to https://admob.google.com/ and login with your Gmail account. Click Sign up, and continue. As you will see in the sign up process (see screenshot below), you will need to provide you country, time zone, and the billing currency, approve the terms and conditions, and click continue. See the screenshot below for a references.
TIP: If you have ad blockers installed in your browser you will need to turn those off before you can sign up or view the AdMob page. A good idea for the future is to whitelist that url above so you don’t have to turn on/off your ad blocker every time you visit this website.
Then you will need to verify your account with a verification email sent to you, a valid phone number, and then you should be all set to get started.

Adding Your App
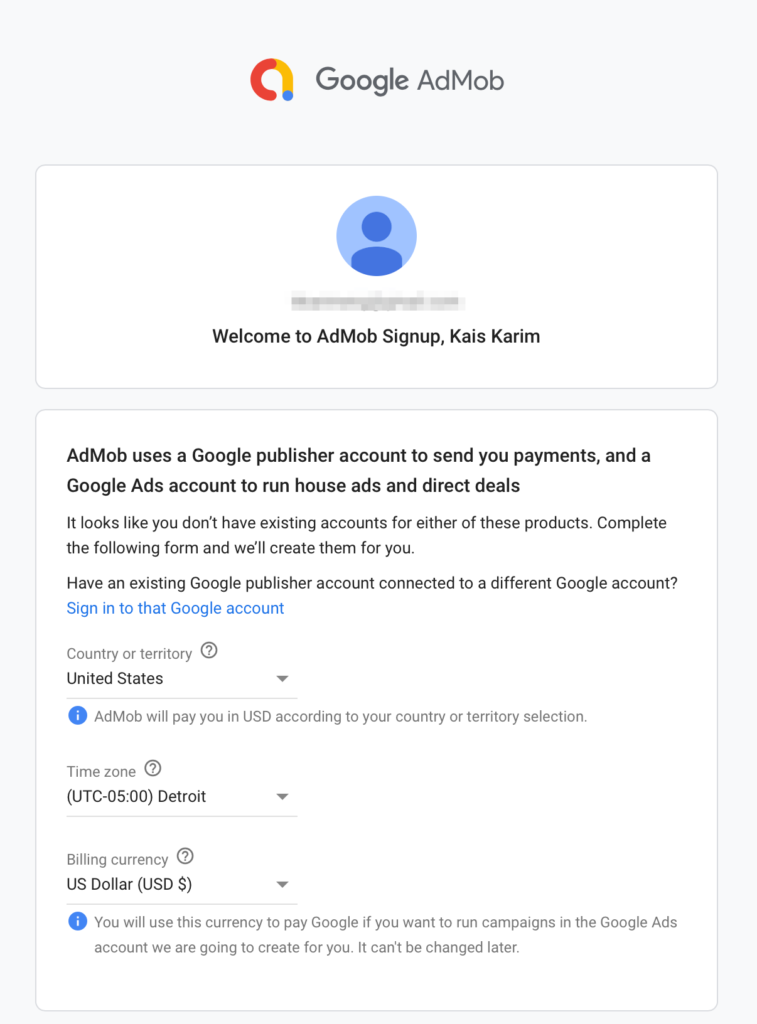
Once you finish the sign up process, you will land on the AdMob dashboard where you can add your first app. This screenshot below is from my personal account, and while yours might look a bit different, you can still follow the same directions.
From the side menu, click on Apps, then select ADD APP,
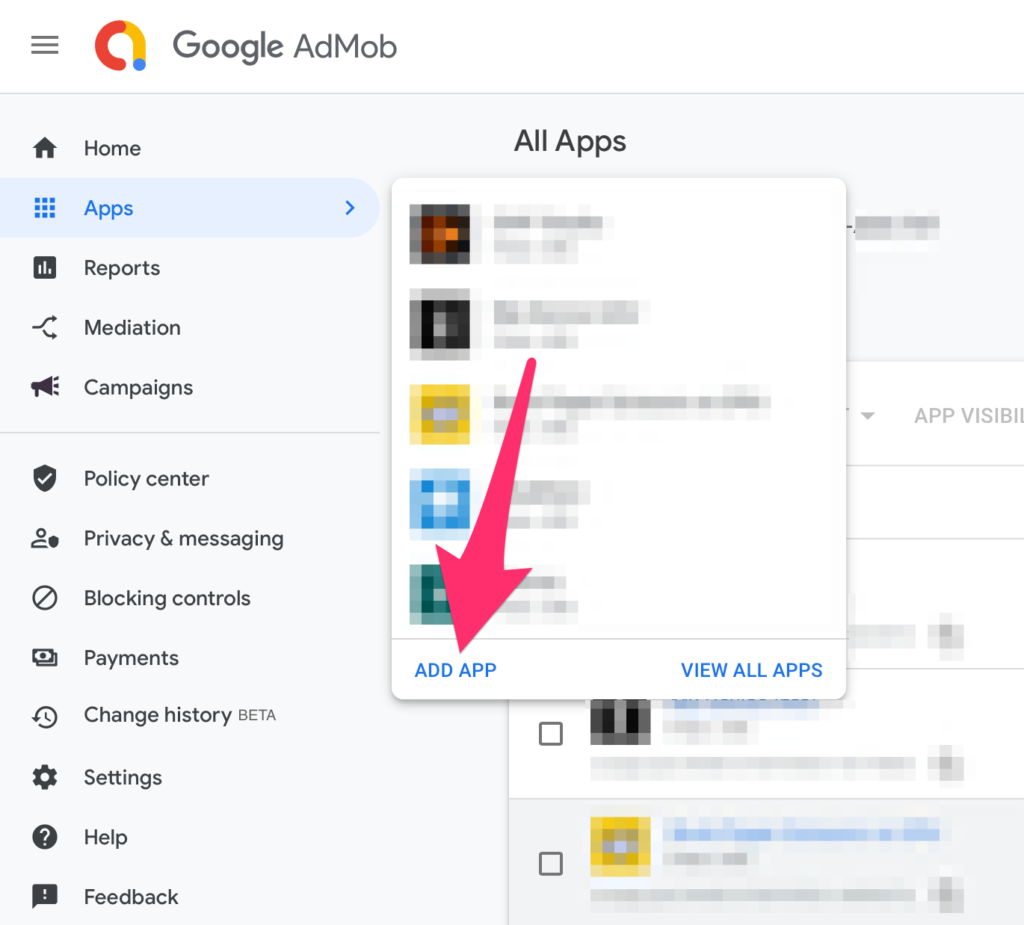
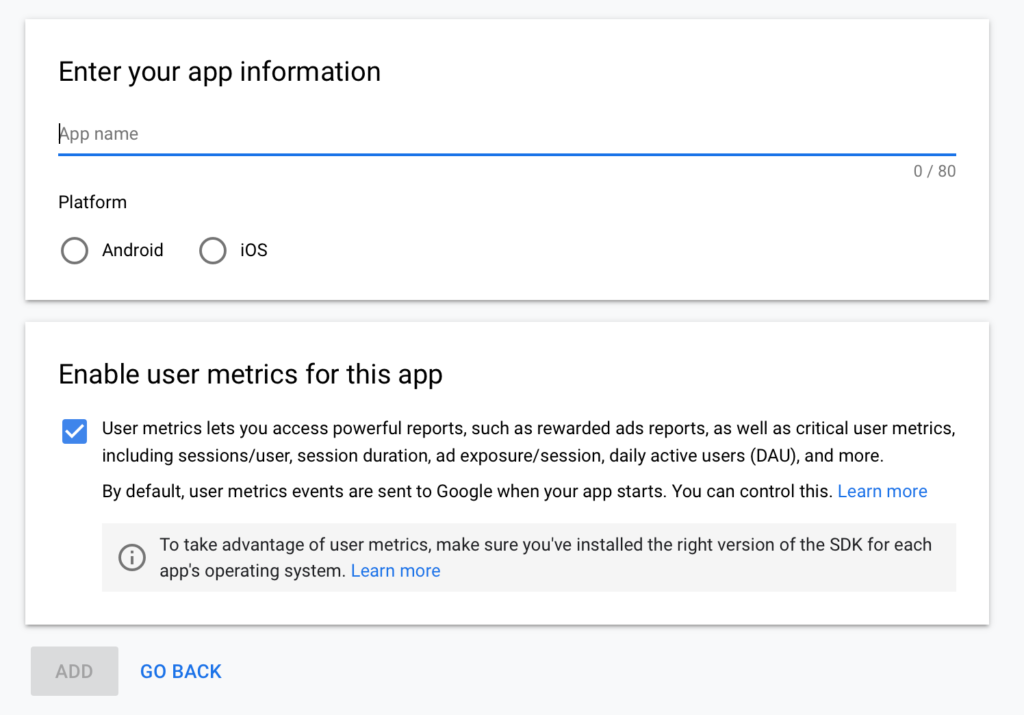
Then you will be asked if your app is already published or not.
If you select NO, then you will have to enter the App name, and which platform it will be on.
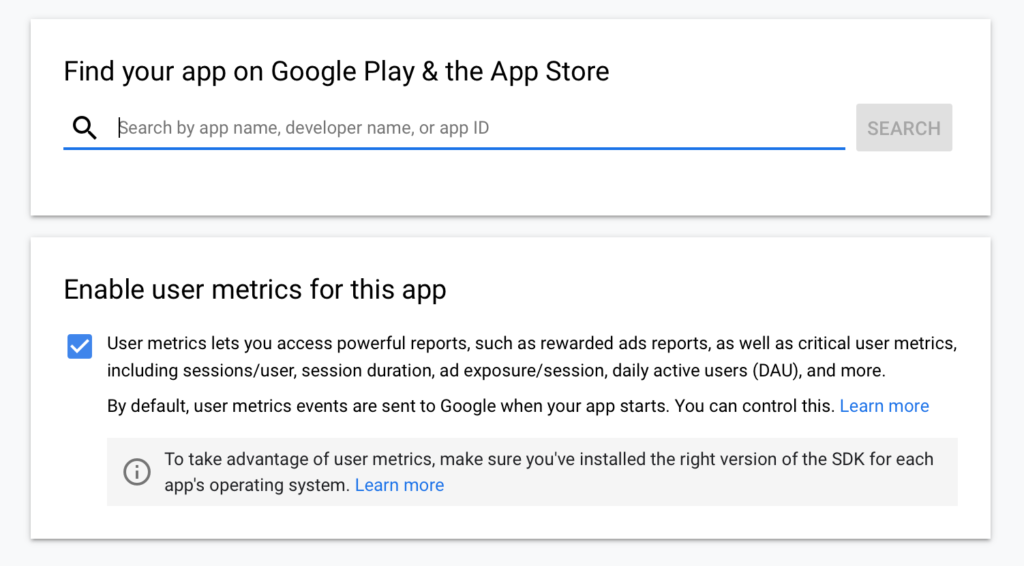
But if you have already published your app, then you can search for it in the search box provided, which supports searching both, the App Store and the Play Store.
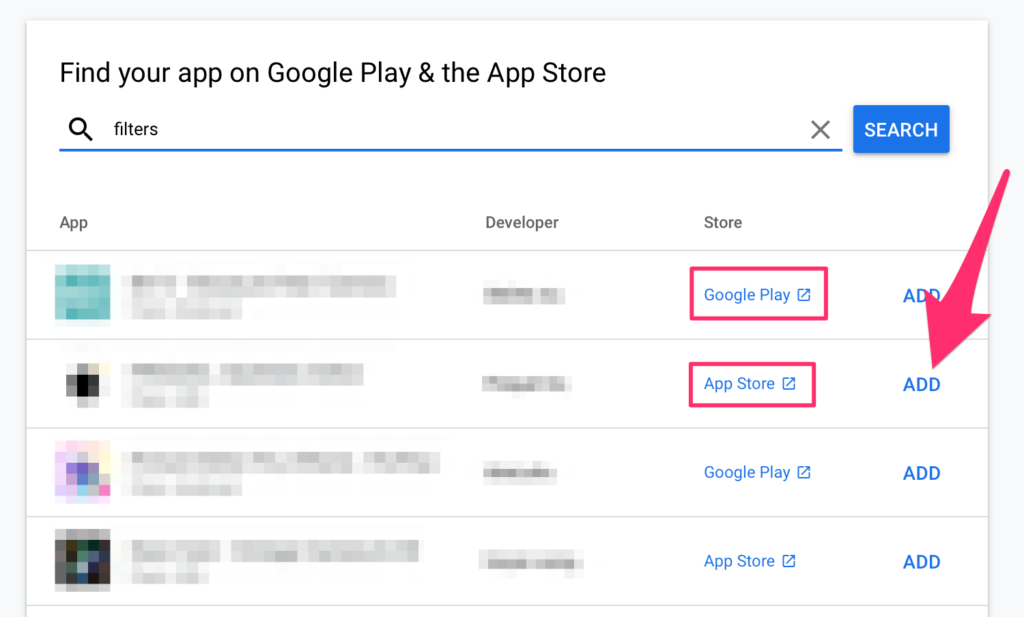
Here is an example of searching for an app called filters. You will notice that the search results are for both iOS and Android, so make sure to find your app and not someone’s else app. Click ADD to proceed.
TIP: you can search based on the developer name instead of the app name, which will make it easier to find all your published apps in the App Store or Play Store.
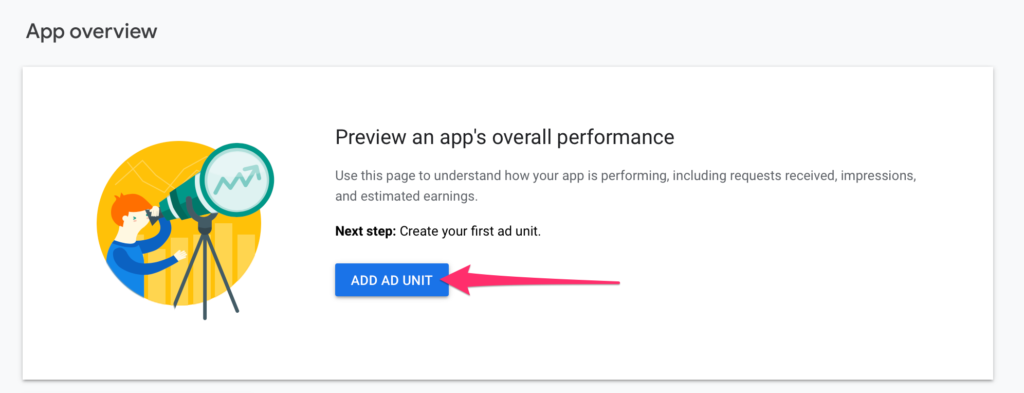
Once you click ADD, you will get the following screen. The most important piece in this screen is your App ID. This will be used when you add the code to initialize the SDK into your app, so before we proceed make sure you copy that and save it somewhere. But don’t worry, you can find it later if needed by going to the APPS section from the side menu and clicking VIEW ALL APPS.
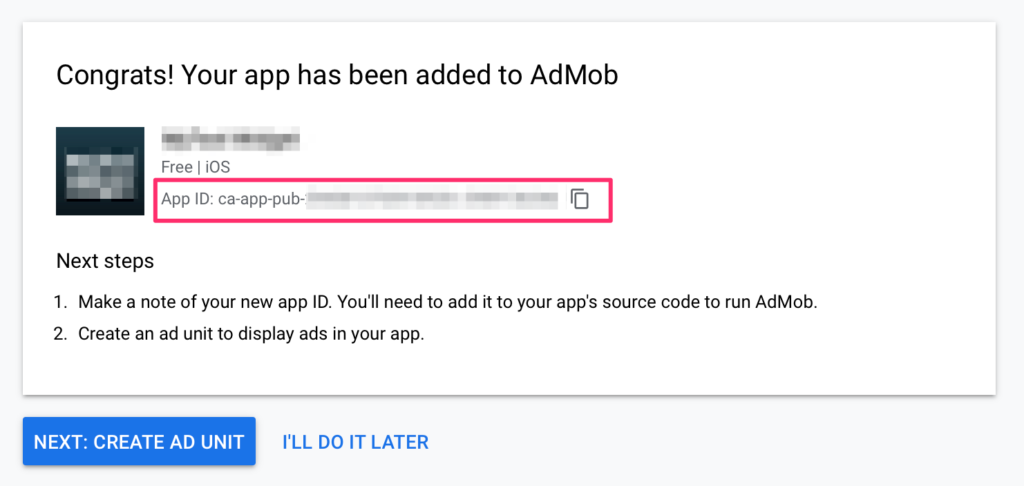
While you’re still on that screen above, and you have saved that App ID, click on NEXT: CREATE AD UNIT. If you clicked on I’LL DO IT LATER don’t worry, Go to the APPS section from the side menu, select your app and click ADD AD UNIT like in the screenshot below.
Creating Your First Ad Unit
After clicking ADD AD UNIT, you will see the following screen. And while it might look overwhelming, each ad will have very similar setup and coding requirements so once you setup one you can setup a different type easily.
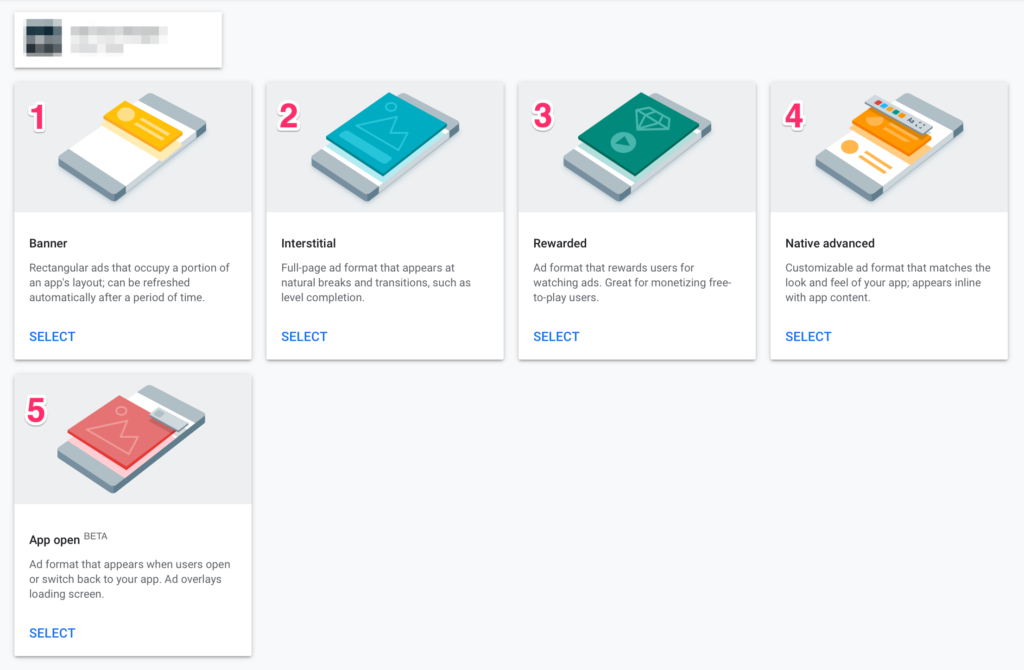
1- Banner: This is the most popular ad unit that you see in almost all apps with ads, it is a rectangular ads that you can place anywhere you want in your app. The format of this ad is usually either a text, a photo, or rich media.
2- Interstitial: This is a full-screen ad that is designed to appear after the user completes a certain task, or when transitioning between pages. The format of this ad is usually a video or animated photo, but it can have still image or sometimes just texts.
3- Rewarded: Similar to full-screen ads, this type of ad allows the user to interact with the ad before you can dismiss it in order to achieve or unlock something. This is very common in mobile games.
4- Native Advanced: This type of ad allows you to customize the ad unit to match your app content. For example, if you have a new app displayed in a tableView style you can match the style of this ad to blend in with your cells.
5- App Open: This ad unit will appear to the user once they open your app, or when they come back to it. This ad format is new and still in beta, so you might experience some issues or instability if you decided to use it.
TIP: I would highly recommend starting with a Banner type. Its the most simple one you can add to your app without cluttering the interface or annoying your users. I find that the full-screen ads, like Interstitial and Rewarded are the most annoying to the user especially if they’re in the middle of performing a task or about to do something important. Therefore, I recommend starting with a Banner and then evaluate your revenue and go from there.
In this post, I will be creating a new Banner ad by clicking on SELECT underneath the Banner box (#1 in the above screenshot).
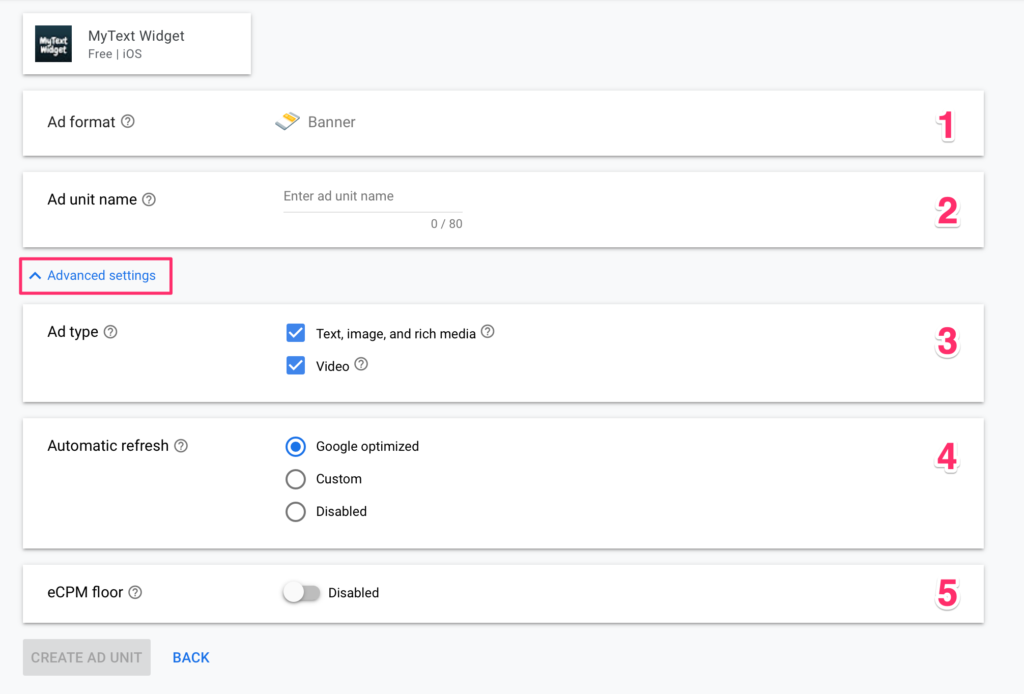
1- Ad Format: This is the type of ad you have chosen in the previous step. In this case, it is the Banner ad.
2- Ad unit name: You can name your ad whatever you want. I would recommend naming it something related to the type. For example, bannerOnMainView.
Advanced Settings: These advanced settings are hidden by default, once you expand this section you will see options 3-5. Note that this section is optional and you don’t have to fill it out.
3- Ad type: You can choose the type of ad you want to be displayed for your banner. By default, all the types are selected, but you can disable the ones that you don’t want. For example, if you app is heavy on text, you might not want to distract the user with a video or a rich content and you would rather display text-only ads.
TIP: It is best to leave all ad types selected to gain more potentially. If Google can’t find the specific type of ad you have selected then no ads will be served at all and your users will see an empty space instead.
4- Automatic refresh: By default this is set to “Google optimized”, which means that Google will figure out when to refresh the ad and display a new one. If you want, you can set this to the number of seconds you want the ad to refresh, but keep in mind the minimum is 30 seconds. Also you can choose to display refreshing ads all together.
5- eCPM Floor: Per Google, this value defines the minimum eCPM that Google needs to meet in order to serve an ad on your app. It is better to leave this disabled because setting high numbers means less fill rate for your ad, which means less revenue.
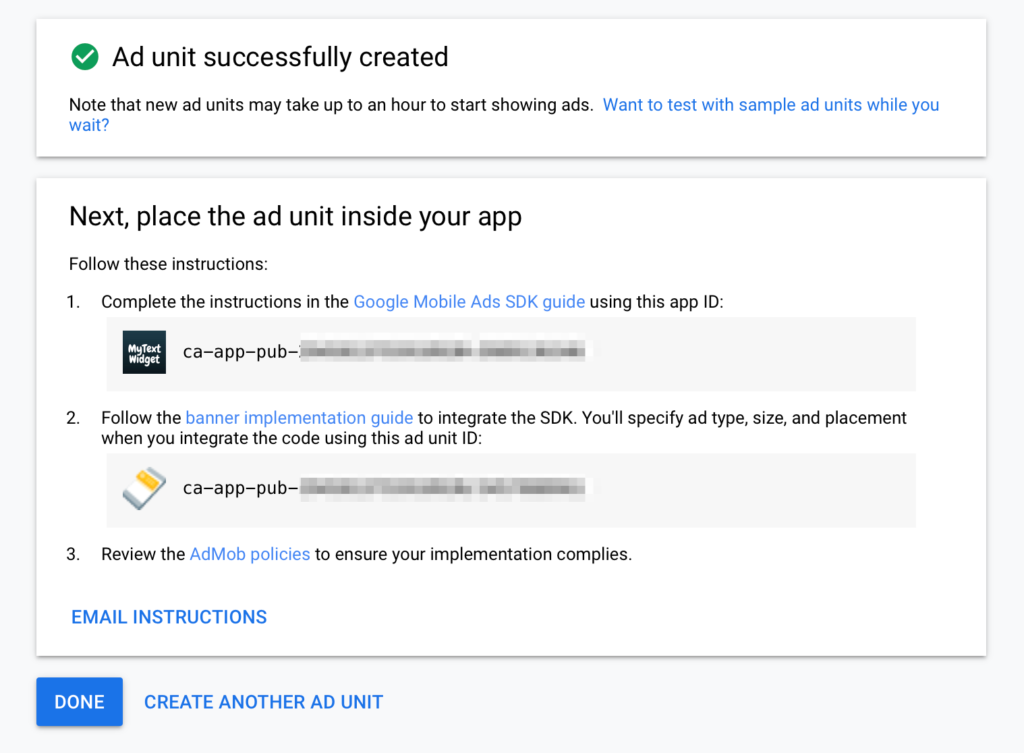
Once you’re done filling all that info slam that CREATE AD UNIT button, and you will be taken to the following screen below.
Implementation
Now that you have created your first ad in AdMob it is time to add the AdMob SDK into your app, and implement that banner to show up.
TIP: In the screenshot above you will notice that step 1 has the app ID that you got when you first created your app in the first step of this tutorial. But don’t get that mixed up with the other ID in step 2, this one is for the banner ads that you have just created.
Step 1 – Adding the SDK: The first thing you have to do now is to add the AdMob SDK into your app. Google’s documentation (here) provides a very detailed step-by-step instructions on how to do that. You can add the SDK either by using Cocoapods, or manually, but I highly recommend going with Cocoapods especially if you are already using other third-party libraries that uses it. Unfortunately, Google’s AdMob doesn’t support Carthage or Swift Package Manger yet.
Step 2 – Implementing the Ad: After you have completed step 1, you can now implement the banner you just created. Use the ID you got when you created the banner as shown in the screenshot above. As mentioned earlier, Google’s documentation (here) is very detailed and easy to follow, and you can get this done within few minutes if you are looking to add a simple banner to your app.
TIP: I highly recommend reading both documents thoroughly to ensure that you follow all the rules and guidelines of AdMob. Failure to adhere to those guidelines might results in account termination.
TIP: Google recommend using a test ad ID to test with before you add the real ad ID that was generated for your ad (see point 2 in the screenshot above). That being said, make sure you don’t go live with this ID since your ad will not display any ads. I’ve done that before.
Payments
Now that you have done with creating the ad, setting up the SDK, and possibly pushing your app to the App Store as well (see my post: App Submission Checklist), you might wonder how are you going to get paid?
Well, there is a section on AdMob specifically for that, located on the side menu to the left where you can manage your payments, setup your bank account info, and other details. See screenshot below.
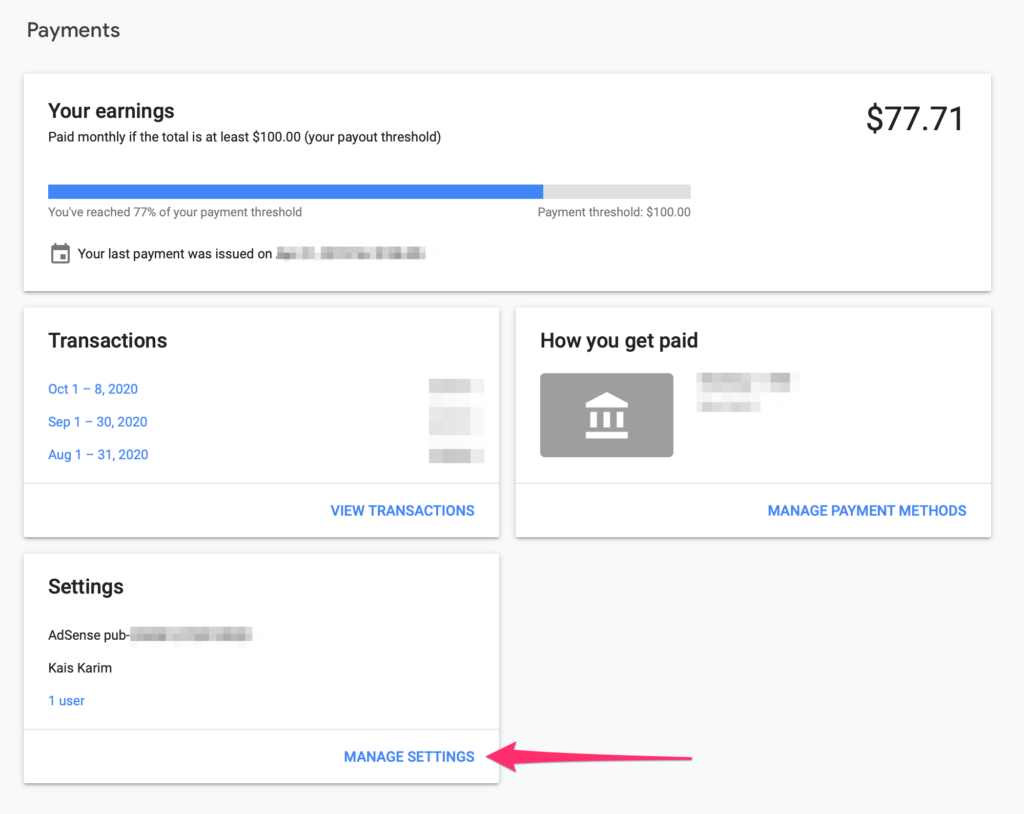
One you need to do for sure before you can actually get paid is adding your tax information. If you are living in the United States, you will need to enter your full legal name, your full social security number, address, and phone number. This is required by law and there is no way around it. To do so, go to MANAGE SETTINGS (see the arrow in the screenshot above), then scroll down to the Payments profile section, and provide your details there.
As you see in the screenshot above, Google sets a payment threshold of $100. So basically you won’t be paid anything till you total revenue reaches a $100. Currently, I’m at $77, and trust me, it takes a while till your reach $100 unless you have this viral app with a lot of active users.
Conclusion
The goal of this tutorial is to get you started with AdMob. There are many other 3rd-party ad-serving companies that you might be able generate more revenue from, but in my opinion I trust Google the most with my private information.
AdMob is a huge advertising platform, and it provides many great features, one of which is Reporting, which gives you a lot of detailed information on how your ad is doing and how much you’ve gained.
I hope you found this tutorial detailed enough to get you started. If you have any questions, comments, or thoughts please leave a comment below.
Thanks! -Kais